A well-wired home is a happy home.
Though electrical wiring might not be the first thing you think of when planning your renovation, it’s still one of the most important components. It keeps so many different aspects of your home running, from lighting to the charging points and even your smart home setup.

However, its complexity can be rather off-putting. That’s why we spoke to interior designers Edmund (from Insight.Out Studio) and Cayden (from Saege) to break down the entire process for you, and help you identify the key items to think about before you start discussing your electrical plan with your interior designer.


1. First off, when do electrical works happen?
Typically, electrical works happen in two stages:
Stage 1: Wiring

View this project by Saege
This is when all your cables are laid. The renovation stage when it happens depends on whether your unit should have concealed or exposed wiring.
- In HDB flats, all installed wiring must be exposed, which means you can see the casing. This would be done after tiling. While BTO flats these days come with concealed wiring, any wiring done on a homeowner’s end should be exposed.
- For condos, the wiring must be concealed. This means wiring should be done after hacking, but before tiling – because for wet areas such as the kitchen and toilets, the wiring has to be in place first before the tiles are laid.
In Cayden’s experience, the wiring can be run in about 2-3 days for most properties.
Stage 2: Electrical installation

View this project by Insight.Out Studio
The electrical installation stage is when items like the power points, switches, faceplates, and the lighting are all installed.
(That means you’d need to have purchased your lighting fixtures by then.)
Cayden says this stage happens “at about 80% into the renovation, when the carpentry has been already installed” and that it typically takes about 1-2 days depending on the size of the house.
2. The key considerations for a good electrical plan

View this project by Insight.Out Studio
As both Cayden and Edmund emphasise, your interior designer is there to help you with the technical aspects of the electrical plan.
However, you should let them know about your household’s preferences and lifestyle so that your home can meet your needs.
Lighting around the home
Types of lighting

View this project by Insight.Out Studio
More and more homeowners are putting an emphasis on their lighting for a better ambience instead of sticking with the traditional flush mount ceiling lights.
The options range from recessed downlights to soft cove lighting and more. In such cases, you may need a false ceiling, with which you can also hide the exposed wiring.
Some also choose to install cornices to hide the ceiling wiring.
Switch control for lighting

View this project by Saege
It’s worth considering the location of your switches, and the fixtures they control.
Here’s a situation Cayden poses: When you enter your home, you have a switch by the door to turn on the living room lights. But what if you’re coming from the bedroom and want to turn on the living room lights?
One solution is putting a two-way switch in the bedroom corridor so you don’t have to walk all the way to the main entrance to turn on the lights.
Power point placement

View this project by Saege
It couldn’t be more important to plan the placement of your power points. When you’re discussing your rough electrical wiring plans with your designer, it’s best to consider:
- Where you’ll use your devices (e.g. laptop, Kindle, etc.)
- The appliances you own or intend to purchase, and where they will go.
In the kitchen, dining and service yard:

View this project by Insight.Out Studio
Cayden emphasises that appliances fixed in place need dedicated power points because they have specific electrical requirements. These include your oven, refrigerator, washing machine, and more.
Similarly, other countertop appliances you use frequently – like your kettle, rice cooker and air fryer – would need their own sockets too.
“You should ensure you have sufficient points for each of your appliances,” he shares. “If you don’t, you’d be forced to use a multi-plug, which can become an electrical hazard and cause power outages.”
Another example Cayden brings up: if hotpots are a common affair during New Year celebrations, you might need a socket near your dining table to plug in your steamboat pot since such portable appliances often have short cords.
In the living room:

View this project by Saege
Both Edmund and Cayden agree that the TV console area requires many power points, as you’ll need to cater for things like the TV power point, consoles, and speakers. They recommend having minimally 4 power points (2 double sockets), although Edmund mentions that the tech-savvy homeowner may need up to 6 power points (3 double sockets).
Also, don’t forget about the other items that need electric points – like floor lamps, massage chairs, and electric recliner sofas.
In the bedrooms:
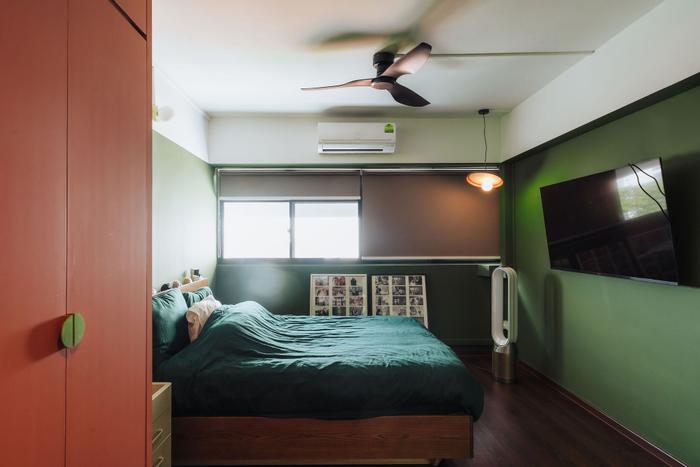
View this project by Insight.Out Studio
Compared to the other spaces, your bedrooms typically don’t have as many requirements. However, there are still lifestyle habits you might need power points for – like charging your phone by the bed or using your hair dryer by the vanity.
In general:

View this project by Saege
The best approach is to imagine how you will use each space daily, and to make a list of appliances you’ll likely use in each space.
For example, if you have a corded vacuum cleaner, it’ll be a hassle if you don’t have enough power points around your home to keep it plugged in.
Data points and internet connectivity

View this project by Saege
Before wiring works start, consider where your data points should be. Areas that require good internet connectivity (like your study room or gaming area) should use a strong data point aka direct LAN points – so make sure to let your ID know this beforehand.
Wi-Fi mesh systems work better when they’re plugged into these direct LAN points, and pulling these wires post-renovation can be costly and difficult.
Smart home requirements

View this project by Insight.Out Studio
When it comes to an integrated smart system, both Cayden and Edmund emphasise that the electrician would need to pull additional wiring -- called a neutral wire -- to all the smart switches.
That’s why it’s important to share whatever you have in mind for a smart home before all the wiring is in place to avoid complicating things (and eventually incurring costs by retrofitting the neutral wires).
 Find IDs
So, how much does electrical wiring cost?

View this project by Insight.Out Studio
Let’s talk numbers: after all, it’s one of the most important considerations for us when making any purchase.
While the actual costs depend heavily on your layout and choices, here’s a ballpark range of the costs of the standard electrical plan according to Edmund:
- 4-room BTO: $2,500-$3,500
- 4-room resale HDB: $3,500-$4,500
- 3-bedder resale condo: $4,500-$5,500

View this project by Saege
Here are other costs to consider:
- While each lighting or power point typically costs $45–$75, concealed points cost more. Based on Cayden’s experience these points cost minimally around $100, while Edmund estimates that an average of around $120 each.
- If you want a two-way switch similar to the example we mentioned earlier, it could cost $300 and above
- In some cases, especially for older resale flats, you may need/want to change the position of the DB box, which could cost up to $550 in a 4-room resale HDB

View this project by Saege
As Cayden shares, some designers may do up an electrical rewiring package based on the minimum number of points and lighting required, so that homeowners can plan a rough budget.
Note that this package usually accounts for about 75% of the overall electrical rewiring cost, as there may be a variation order. The reason? Because they may need to tweak according to the actual number of points needed on site.
Common (and costly) mistakes to avoid

View this project by Insight.Out Studio
As both Cayden and Edmund share, the most costly mistakes are the ones that crop up after the renovation is complete. Here are some things you should take note of and avoid:
- Not including data points in rooms to have a more stable and stronger connection beyond the living room
- No LED provisions for carpentry, like shelves and wardrobes
- Not planning for an induction stove – the wiring has to be run before carpentry, or you risk having to deal with unsightly casing in your lower kitchen cabinets
Incurring the mistakes above after the carpentry and ceiling are installed means you’ll have to tear things back down – which isn’t just costly but also time-consuming (and frustrating).
Plus, you run the risk of a finish that looks markedly different from the rest of your walls/space.
Things to check before the handover

View this project by Saege
Before you heave a sigh of relief (and excitement) and sign off on your renovation, you should check on these key things:
- Are all sockets and switches in the correct places?
- Are light placements and pendant heights aligned and functional?
- Do doors or furniture block access to switches or lights?
- Have all data points and smart switch connections been installed?
It’s far easier to adjust these early on instead of after your move into the place. Depending on your contract, your interior firm may help with small shifts, but major changes will incur costs and damage finished walls or ceilings.
Ease your electrical wiring process with the right preparation

View this project by Insight.Out Studio
Electrical wiring is one of those things you only truly appreciate after you move in. So, do the prep early: study your floorplan, picture your daily routine and list your appliances. Talk through your lighting preferences as well, and make sure to raise any concerns with your designer early on.
For help getting started, simply click the button below to let us know your requirements and we’ll connect you with interior firms – for free.
Love the homes above, or got a question for us? Leave us a comment down below! 👇

 Get a budget estimate before meeting IDs